The Easiest Ways to Roast a Chicken at Home
View Recipe
This post was written by Heinen’s partner, Halle Snavely.
Roasting chicken is my favorite pastime. I often roast a chicken on Sundays to use in different meals throughout the week, but I’ve noticed that when I mention roasting chicken to others, they look at me like it’s an impossible task. Roasting chicken is not only easy, it’s also the perfect comfort food.
Here are a few tricks of the trade that will help you get started, plus a few of my favorite roasted chicken recipes.
5 Tips for Roasting Chicken at Home
- Salt + time = flavor and tenderness. Salt the chicken as far in advance as possible, ideally right when you get home from the grocery store. Time helps tenderize and season the meat.
- Or better yet, brine the chicken. Salting the chicken, as described above, is known as a “dry brine,” but you can also create a wet brine. Keep it simple by using salt water, or add garlic and herbs to give it a little flavor. Dry or wet brining with salt also helps to kill bacteria. Check out the lemon herb chicken recipe below for an example of a wet brine.
- Always let the chicken come to room temperature before cooking, otherwise it won’t cook evenly.
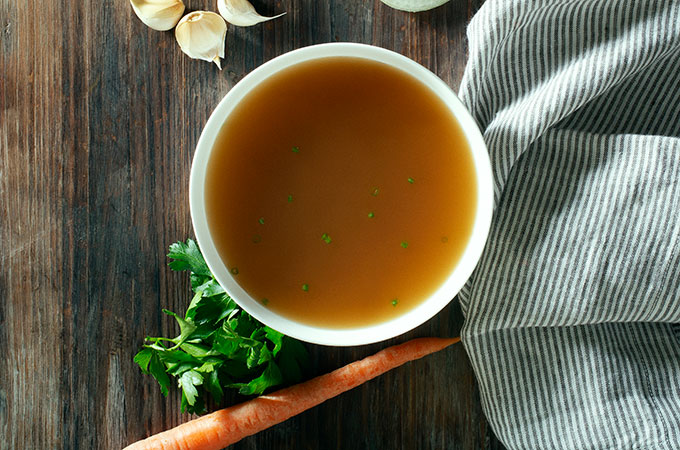
- Save the bones to make stock. Making your own stock is super simple and completely delicious.
- To roast breast-side-up or breast-side-down? That is the question. One way isn’t necessarily better than the other, as it’s based on your own preference. I’m personally in the breast-side-down camp for a couple of reasons. First, the breast has a lower fat content than the legs and the thighs, which means it cooks faster. This tends to result in chicken, which is never a good thing. However, if you roast the chicken breast-side-down, the breast sits in all those delicious pan juices, so it comes out nice and moist. Second, most people who roast chicken breast-side-up do so because they want crispy chicken skin. While I fully understand this inclination, I don’t necessarily agree. Which brings me to my next point…
The Top 2 Reasons to Roast Chicken at Home
- I’m going to say something controversial: crispy chicken skin is a myth (mostly). Hear me out. Chicken skin is only crispy right after it comes out of the oven. By the time you let it rest then carve it, the skin loses most of its crispiness. In m opinion, that is just one more reason for you to roast chicken at home – if you are the one who pulls the chicken out of the oven, you also get to enjoy the crispy chicken skin during its short lifespan.
- If you roast and carve chicken at home, you get to be the person who enjoys the oyster, which is the best part of the whole chicken. It is juicy with just the right texture, but you have to know where to find it. Here is a video that details how to carve a chicken and where to find the oyster. Just make sure not to tell anyone else about it.
The Easiest Ways to Roast a Chicken at Home
Cook time: 90min Prep time: 30min Total time: 120min
Servings: 4-6
Ingredients
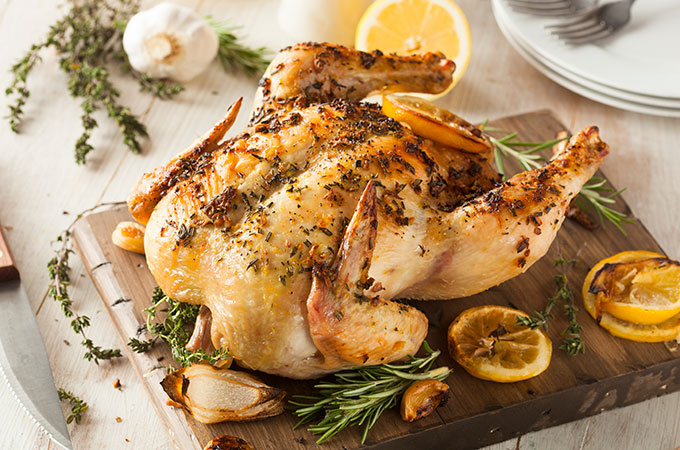
For Lemon Herb Roasted Chicken
- 1 whole chicken
- ¾ cup + 1 Tbsp. kosher salt, separated
- 2-3 sprigs fresh rosemary, leaves removed from stem
- 5-7 sprigs fresh thyme, leaves removed from stem
- 5-7 sprigs fresh sage, leaves removed from stem
- 10 basil leaves
- 8-10 garlic cloves, peeled
- 2 whole lemons, rinsed, quartered and seeded
- 1/3 cup butter or ghee
- 1 Tbsp. Heinen’s extra virgin olive oil
- ½ tsp. freshly ground black pepper
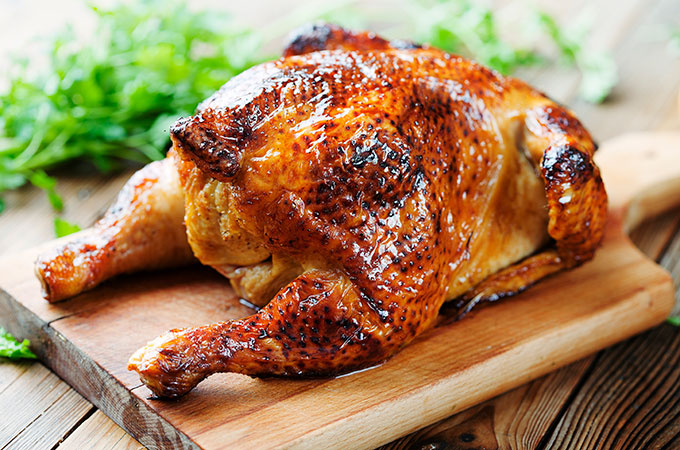
For Coconut Miso Roasted Chicken
- 1 whole chicken
- 2 Tbsp. + 1 ½ Tbsp. kosher salt
- 2 Tbsp. + 1 ½ Tbsp. kosher salt 3 Tbsp. miso paste
- 1 can Heinen’s full fat coconut milk, run under hot water for a few minutes
Homemade Bone Broth
- Bones from about 4 chicken carcasses, about 7 lbs.
- 7 quarts of water, or enough to fully cover everything in the pot
- 3 onions, unpeeled and quartered
- 3 carrots, halved crosswise
- 3 celery stalks, halved crosswise
- 1 Tbsp. black peppercorns
- 2 bay leaves
- A handful of fresh thyme sprigs
- A handful of fresh parsley sprigs
- 1 tsp. white wine vinegar
Instructions
For the Lemon Herb Roasted Chicken
- Pour ¾ cup of kosher salt into a bowl large enough to fit the whole chicken. Add 2-3 inches of lukewarm water and stir until it dissolves, then fill the rest of the bowl with cold water. Put the chicken in the brine and let sit on the counter for about an hour. This will get rid of all the nasty bacteria and help season the bird. After an hour, drain the brine and thoroughly pat the chicken dry with paper towels.
- Preheat the oven to 375°F. While the chicken is brining, prep the other ingredients. Thoroughly chop the rosemary, thyme, sage and basil (you want to have at least 1/2-3/4 cup of chopped herbs). Put the herbs in a bowl and combine with the butter or ghee, 1 Tbsp. of salt and 1/2 tsp. of pepper until well incorporated. Mix in the olive oil, adding more if necessary. The texture should be slightly “liquidy,” but still thick.
- Place the chicken in a glass baking dish or a cast iron skillet. Use your fingers to get underneath the skin of the chicken and create space between the skin and the meat. Do this to the whole chicken. Scoop up some of the herb butter mixture with your fingers and coat the chicken underneath the skin on both sides and including the legs. Don’t worry about the wings because there isn’t much meat there. Make sure there are no pockets of air, otherwise steam will collect in those areas and it won’t cook evenly. Rub the excess herb butter on the outside of the skin.
- Smash all of the garlic cloves with the side of a large knife. Put one of the quartered lemons inside the chicken along with all of the garlic. Place the other quartered lemon around the outside of the chicken. One lemon on each side of the baking dish or skillet works perfectly.
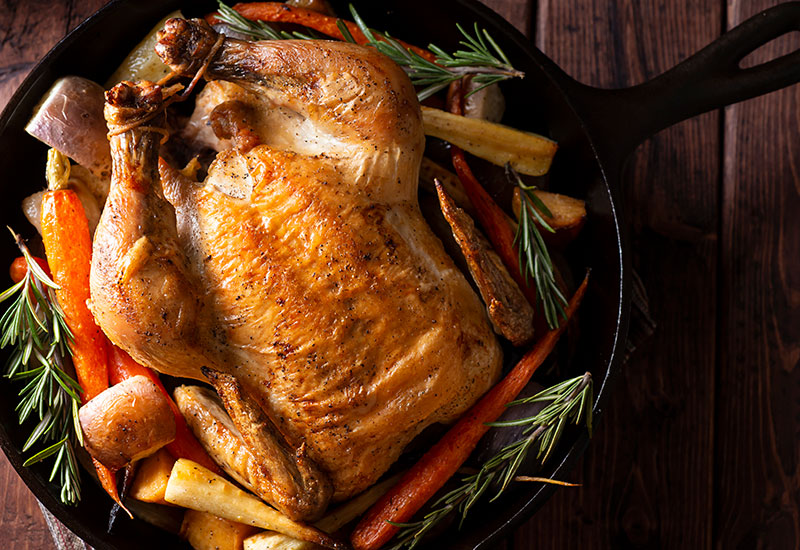
- Roast the chicken breast side down (if preferred), so the breast meat gets nice and juicy. Place it just above the middle rack so the skin gets nice and crispy. Roast in the oven at 375°F for an hour and a half, or until the internal temperature reaches 165°F.
- Remove the chicken from the oven and let it sit for at least 10 minutes to seal in the juices. Then carve it however you like. My favorite thing to do is pull it apart with a fork and knife and add it to a bowl. Don’t worry about making it look pretty, literally just pull it all apart. Pull all of garlic cloves from inside of the chicken and add that to the bowl with the chicken.
- Take all of the lemons and use a knife or a fork to scrape the lemon pulp into the chicken mixture, then spoon the pan drippings from the baking and mix it all up.
For the Coconut Miso Roasted Chicken
- Pull the chicken out of the refrigerator the day before you plan to roast and salt it generously with about 2 Tbsp. of kosher salt. Let it sit on the counter for 30 minutes. After 30 minutes, add the remaining 1 ½ Tbsp. of kosher salt, miso paste and the coconut milk to a large Ziploc bag. Seal the bag and move around the contents until combined. Add the chicken to the bag, and move the contents again until the chicken is coated. Place the bag in the refrigerator and let the chicken marinate overnight. Again, if you forget to do this the night before, just complete all these steps as early as you can the next day.
- At least an hour before you plan to roast, pull the chicken out of the refrigerator. Remove the chicken from the bag and use your hands to remove as much excess coconut milk from the meat as possible. Place the chicken, breast-side-up in either a 9×12 glass baking dish, or a 10-inch cast iron skillet. Let it sit on the counter so that it can come to room temperature. Preheat the oven to 350°F.
- If using a cast iron skillet, make sure the legs of the chicken are facing in the opposite direction of the handle. Place the chicken in the oven with the legs facing the back of the oven. The back of the oven is hotter than the front, and the breast cooks faster than the legs, so this will ensure that the chicken cooks evenly throughout, and that it browns evenly on all sides. Roast in the oven for an hour and a half or until the internal temperature reaches 165°F.
- Remove the chicken from the oven and let it sit for at least 10 minutes to seal in the juices. Carve and enjoy.
For the Homemade Bone Broth
- Add everything but the vinegar to a large stockpot. Bring the stock to a boil over high heat, then reduce to a simmer. Skim any foam that rises to the top, then add the vinegar. This helps draw nutrients and minerals from the bones into the stock. Simmer, uncovered for 6-8 hours. Keep an eye on it to make sure it stays at a simmer. If the stock boils, the bubbles will recirculate the fat that rises to the top of the stock, which causes the stock to emulsify and creates a muddy flavor. When the stock is ready, strain through a fine mesh sieve and cool. Scrape the fat that rises to the top and save it to use as a cooking medium.
- Stock can be refrigerated for up to 5 days and saved in the freezer for up to 3 months. Fill Mason jars of various sizes and run them under warm water in the sink to defrost when ready to use. Use the same recipe with beef bones instead of chicken, or make a veggie stock with any veg you have on hand!